环境准备
1、Centos系统:CentOS7系统安装
2、Nginx软件: Nginx基本配置
3、Gitlab软件:
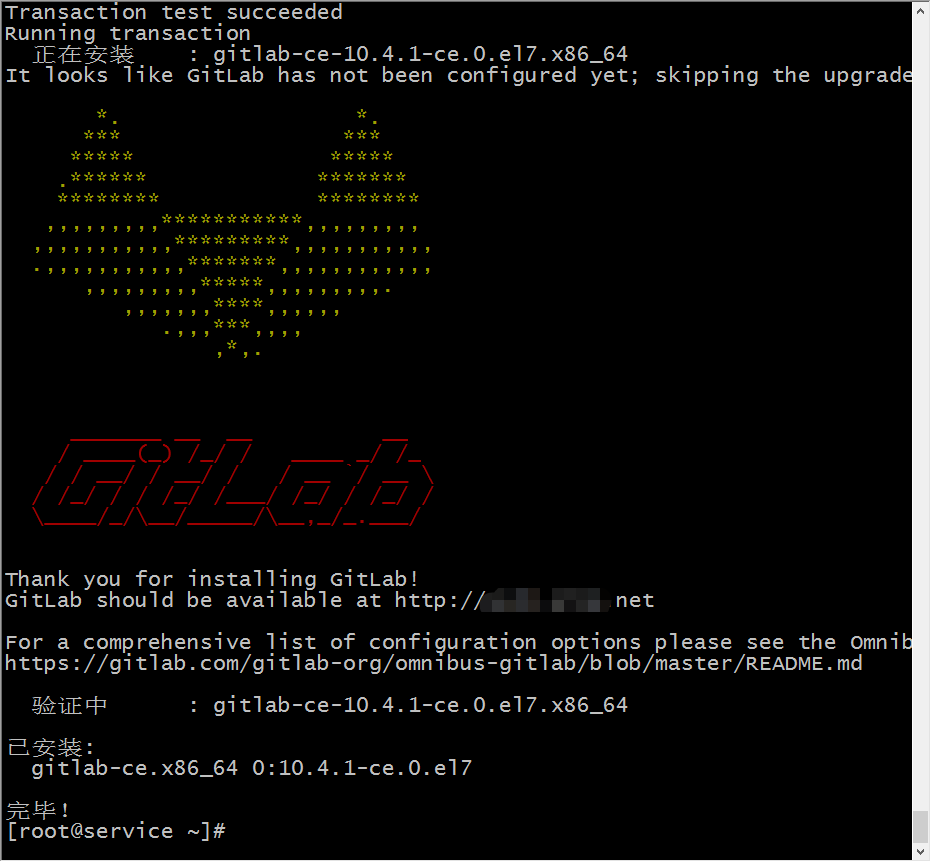
软件安装
基本软件安装
安装gitlab的依赖项
yum install -y curl openssh-server openssh-clients postfix cronie policycoreutils-python
启动postfix,并设置为开机启动
systemctl enable --now postfix
设置防火墙
firewall-cmd --permanent --add-service=http
firewall-cmd --reload
rpm安装
获取安装源,也可以到 官网 直接下载,然后上传到服务器。
wget https://mirrors.tuna.tsinghua.edu.cn/gitlab-ce/yum/el7/gitlab-ce-10.0.2-ce.0.el7.x86_64.rpm
本地安装
rpm -i gitlab-ce-10.0.2-ce.0.el7.x86_64.rpm
yum安装
如果不指定特定版本,直接安装最新版本,则建议使用官网推荐的 YUM方式安装,详见Yum方式安装
添加 GitLab 镜像源
curl -sS <http://packages.gitlab.com.cn/install/gitlab-ce/script.rpm.sh> | sudo bash
安装 Gitlab
yum install gitlab-ce #安装社区版(免费, 企业版 yum install gitlab-ee)

配置
nginx 配置
在 /etc/nginx/default.d/ 下添加 gitlab.conf 配置文件(具体配置详见 Nginx基本配置)。添加以下代码:
# gitlab socket 文件地址

upstream gitlab {

  # 7.x 版本在此位置

  # server unix:/var/opt/gitlab/gitlab-rails/tmp/sockets/gitlab.socket;

  # 8.0 位置

  server unix://var/opt/gitlab/gitlab-rails/sockets/gitlab.socket;
}

server {
  listen *:80;#监听80端口

  server_name gitlab.longger.net;   # 请修改为你的域名

  server_tokens off;     # 是否显示版本号
  root /opt/gitlab/embedded/service/gitlab-rails/public;

  # Increase this if you want to upload large attachments

  # Or if you want to accept large git objects over http

  client_max_body_size 250m;

  # individual nginx logs for this gitlab vhost

  access_log  /var/log/nginx/gitlab/gitlab_access.log;#日志存储位置,需要手动添加目录
  error_log   /var/log/nginx/gitlab/gitlab_error.log;

  location / {
    # serve static files from defined root folder;.
    # @gitlab is a named location for the upstream fallback, see below
    try_files $uri $uri/index.html $uri.html @gitlab;
  }

  # if a file, which is not found in the root folder is requested,

  # then the proxy pass the request to the upsteam (gitlab unicorn)

  location @gitlab {
    # If you use https make sure you disable gzip compression
    # to be safe against BREACH attack

    proxy_read_timeout 300; # Some requests take more than 30 seconds.
    proxy_connect_timeout 300; # Some requests take more than 30 seconds.
    proxy_redirect     off;

    proxy_set_header   X-Forwarded-Proto $scheme;
    proxy_set_header   Host              $http_host;
    proxy_set_header   X-Real-IP         $remote_addr;
    proxy_set_header   X-Forwarded-For   $proxy_add_x_forwarded_for;
    proxy_set_header   X-Frame-Options   SAMEORIGIN;

    proxy_pass http://gitlab;
  }

  # Enable gzip compression as per rails guide: <http://guides.rubyonrails.org/asset_pipeline.html#gzip-compression>

  # WARNING: If you are using relative urls do remove the block below

  # See config/application.rb under "Relative url support" for the list of

  # other files that need to be changed for relative url support

  location ~ ^/(assets)/  {
    root /opt/gitlab/embedded/service/gitlab-rails/public;
    # gzip_static on; # to serve pre-gzipped version
    expires max;
    add_header Cache-Control public;
  }

  error_page 502 /502.html;
}
重新加载Nginx
nginx -t
nginx -s reload
Gitlab配置
Gitlab的配置文件是 /etc/gitlab/gitlab.rb 。
13 external_url '<http://gitlab.longger.net>' #第13行,修改为服务器域名或IP]

826 nginx['enable'] = false#第826行,取消 # 注释,将true 改为 false,关闭自带Nginx使用外部Nginx

取消197-218行,238行的注释,并根据实际情况修改你的配置。

 197  gitlab_rails['ldap_enabled'] = true
 198
 199 ##! **remember to close this block with 'EOS' below**
 200  gitlab_rails['ldap_servers'] = YAML.load <<-'EOS'
 201    main: # 'main' is the GitLab 'provider ID' of this LDAP server
 202      label: 'LDAP'
 203      host: '172.17.1.12'#你的LDAP服务器
 204      port: 389#LDAP服务器端口
 205      uid: 'uid'#管理用户类别
 206      bind_dn: 'cn=Manager,dc=cafintech,dc=com'#管理用户
 207      password: '_the_password_of_the_bind_user'#管理密码
 208      encryption: 'plain' # "start_tls" or "simple_tls" or "plain"
 209      verify_certificates: true
 210      active_directory: true
 211      allow_username_or_email_login: false#是否邮箱登录
 212      block_auto_created_users: false
 213      base: 'ou=People,dc=cafintech,dc=com'#查找用户路径
 214      user_filter: 'ou=gitlab'#用户查找属性
 215 #     ## EE only 企业版本功能
 216 #     group_base: ''
 217 #     admin_group: ''
 218 #     sync_ssh_keys: false
 219 #### 第二用户来源配置 ###
 220 #   secondary: # 'secondary' is the GitLab 'provider ID' of second LDAP server
 221 #     label: 'LDAP'
 222 #     host: '_your_ldap_server'
 223 #     port: 389
 224 #     uid: 'sAMAccountName'
 225 #     bind_dn: '_the_full_dn_of_the_user_you_will_bind_with'
 226 #     password: '_the_password_of_the_bind_user'
 227 #     encryption: 'plain' # "start_tls" or "simple_tls" or "plain"
 228 #     verify_certificates: true
 229 #     active_directory: true
 230 #     allow_username_or_email_login: false
 231 #     block_auto_created_users: false
 232 #     base: ''
 233 #     user_filter: ''
 234 #     ## EE only
 235 #     group_base: ''
 236 #     admin_group: ''
 237 #     sync_ssh_keys: false
 238  EOS#配置结束
保存退出,然后使配置生效。
gitlab-ctl reconfigure
启动服务
systemctl restart gitlab-runsvdir
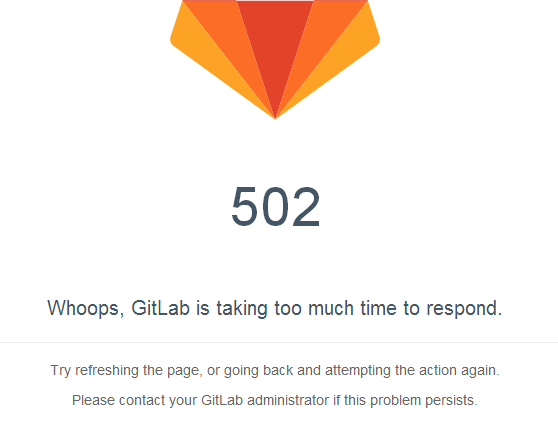
如果访问网页出现 502错误 一般是为权限错误


执行以下命令,给 /var/opt/gitlab/gitlab-rails 添加执行权限(注:每次gitlab-ctl reconfigure后应该都需要)
chmod -R o+x /var/opt/gitlab/gitlab-rails
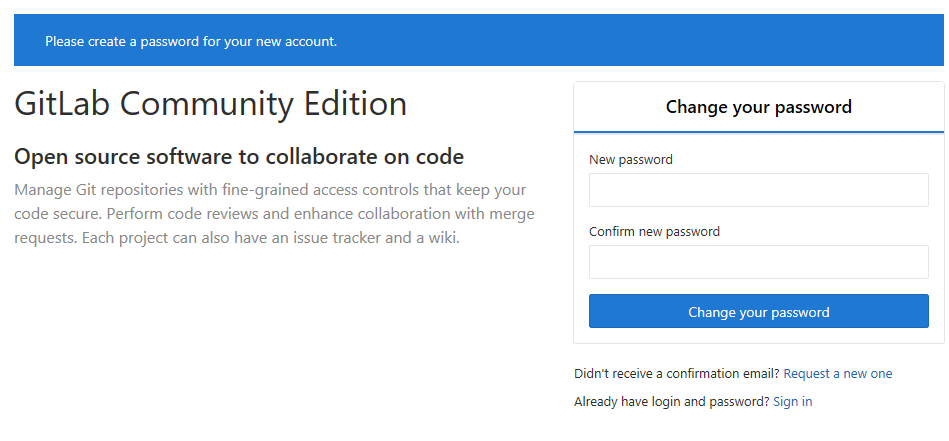
正常启动状态

LDAP 端配置
LDAP端给需要访问的添加 user_filter: 'ou=gitlab',具体使用方法详见 LDAP安装调试

汉化
下载汉化包源码
首先确认当前安装版本
# 获取当前版本存入变量中,以便后面调用。
gitlab_version=$(sudo cat /opt/gitlab/embedded/service/gitlab-rails/VERSION)

建立目录,下载源码,新版本的汉化版本在gitlab上由 ** xhang ** 维护。

# clone汉化版本库

git clone <https://gitlab.com/xhang/gitlab.git>
# 如果以前下载过,则更新
git fetch

比较汉化标签和原标签,导出patch用的diff 文件

cd gitlab
git diff v${gitlab_version} v${gitlab_version}-zh > ~/${gitlab_version}-zh.diff

执行完成后将生成当前版本的补丁文件。

导入汉化补丁

#停止 gitlab
gitlab-ctl stop
patch -d /opt/gitlab/embedded/service/gitlab-rails -p1 < ${gitlab_version}-zh.diff
重启Gitlab服务并重新配置
gitlab-ctl start
gitlab-ctl reconfigure
一定要备份数据
一定要备份数据
一定要备份数据
文章引用
- 官网推荐安装:https://about.gitlab.com/installation/#centos-7
- 汉化库官方说明:https://gitlab.com/xhang/gitlab/wikis/home
- gitlab+nginx:https://www.liaohuqiu.net/cn/posts/non-bundled-web-server-for-gitlab/
转载请注明来源,欢迎对文章中的引用来源进行考证,欢迎指出任何有错误或不够清晰的表达。可以在下面评论区评论,也可以邮件至 long@longger.xin


